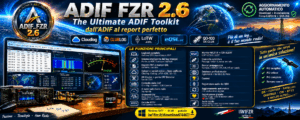
ADIF_FZR Manual
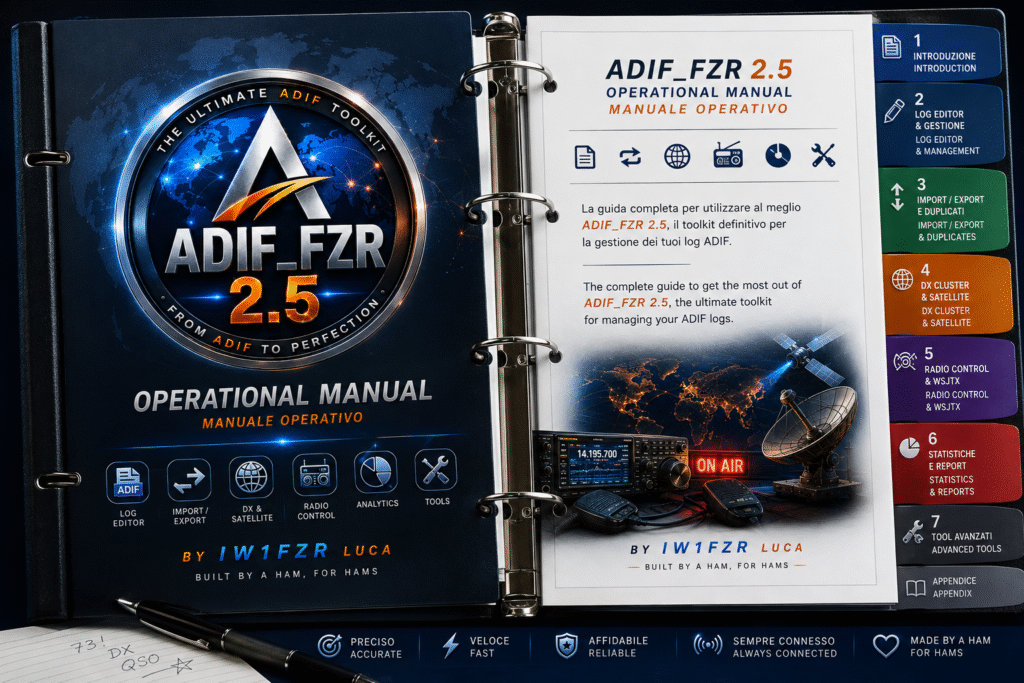


📚 Indice Rapido Documentazione & Guide ADIF FZR
📖 Manuale Utente ADIF FZR 2.6
Manuale di riferimento completo per l’amministrazione dei file ADIF, integrazione digitale WSJT-X, controllo CAT avanzato, analisi premi DXCC/WAS e stampe di registro.
📁 Log & Funzioni Base
🎙️ Operatività & Gestione
🛰️ Radio, Digitale & Sistema
- 15. Controllo Radio CAT (OmniRig / Hamlib)
- 16. Integrazione WSJT-X e UDP
- 16b. Suite CW: Keyer e Decoder Nuovo
- 16c. Banner Propagazione Nuovo
- 16d. Integrazione WSJT-X + rigctld Nuovo
- 17. Modulo FZR ALERT in tempo reale Nuovo
- 18. Satelliti, Doppia Frequenza & QO-100
- 19. Statistiche, Grafici e Monitoraggio Diplomi Ripristinato
- 20. Backup, Ripristino e Manutenzione Database Ripristinato
- 20b. Registrazione, Donatori e Aggiornamenti Nuovo
- 21. Scorciatoie da tastiera e Quick Keys
01. Introduzione ad ADIF FZR
ADIF FZR è una suite gestionale concepita per il radioamatore moderno che necessita di velocità operativa, affidabilità del dato e compatibilità universale. Lavorando nativamente con lo standard internazionale ADIF (.adi / .adif), garantisce la totale portabilità dell’archivio di stazione senza legare l’utente a formati proprietari chiusi.
Il software include un’interfaccia ad alto contrasto ottimizzata sia per l’uso diurno che per i lunghi contest notturni in tema Dark. Ogni impostazione è isolata all’interno del proprio profilo, consentendo la gestione separata di stazioni fisse, portatili QRP o nominativi di club.
02. Principali novità della Versione 2.6 Nuovo
- Tre modalità di logging: la maschera di inserimento QSO offre le modalità Live, Manuale (con selettore calendario e data/ora storiche) e Contest (con gestione progressivi inviati/ricevuti e calcolo automatico dei punti).
- Modulo FZR ALERT: decodifica continua dei pacchetti UDP emessi da WSJT-X con notifica visiva per nuovo DXCC assoluto (NEW), nuovo slot per banda/modo (NEW SLOT) o duplicato (DUPE), arricchito dalle bandierine nazionali.
- Archiviazione SQLite ridondante e Cloud: salvataggio istantaneo ad ogni operazione in un database SQLite locale e rotazione programmata delle copie di backup (direttamente indirizzabili su Google Drive, Dropbox o OneDrive).
- Supporto doppio CAT Hamlib + OmniRig: radiocomando nativo multipiattaforma tramite demone TCP
rigctlde librerie OmniRig per la massima compatibilità radio. - Cruscotto satelliti rinnovato: mappa NASA, sky plot dal proprio QTH, traccia dell’orbita e stazione DX con indicazione del passaggio mutuo (vedi capitolo 18).
- Integrazione diplomatica WAS250 & CQ Marathon: statistiche aggiornate per le commemorazioni ufficiali e gli award internazionali.
03. Primo avvio e profili operatore
Al primo lancio, ADIF FZR avvia la procedura guidata per definire il profilo radioamatore:
- Dati essenziali di stazione: imposta il nominativo principale (es.
IW1FZR), il locatore QTH Maidenhead a 6 caratteri (es.JN45...), il nome operatore e la potenza media di trasmissione. - Architettura Multi-Profilo: puoi creare profili indipendenti per attivazioni esterne (SOTA, POTA), nominativi di sezione o eventi speciali (es.
II1BI). Ciascun profilo possiede un database distinto, coordinate geografiche proprie e configurazioni CAT dedicate. - Commutazione immediata: il cambio di profilo avviene dal menu principale in un istante, aggiornando la griglia e le porte radio senza riavviare l’eseguibile.
- Interfaccia grafica: supporto completo al tema Scuro (Dark Mode) per ridurre l’affaticamento visivo durante le sessioni notturne.
04. Aprire, salvare ed esportare log
La salvaguardia dei collegamenti registrati è garantita a doppio livello:
- Apertura rapida: tramite File → Apri Log selezioni qualsiasi file ADIF. L’indicizzazione legge e ordina decine di migliaia di QSO in una frazione di secondo.
- Salvataggio SQLite continuo: ogni record memorizzato o ritoccato viene consolidato sia nel file ADIF di sessione sia nel database relazionale protetto SQLite.
- Backup automatico a rotazione: il software genera archivi storici datati nella cartella di sicurezza. Selezionando un percorso cloud (OneDrive, Dropbox, Google Drive), la sincronizzazione remota è completamente trasparente.
- Esportazione mirata: genera file ADIF filtrati per data, singola banda, singolo modo digitale o stato di conferma (es. solo QSO da inviare via bureau o da accreditare su LoTW).
05. Importazione da altri logger e formati
ADIF FZR rende immediata la migrazione da altri applicativi di shack (WSJT-X, N1MM, Logger32, HRD, MacLoggerDX, Log4OM):
- Import ADIF standard: elabora file cumulativi normalizzando campi temporali, frequenze e formati RST.
- Finestra “Conferma campi dedotti”: durante l’importazione (in particolare dei log FT8/FT4), il motore confronta i nominativi con la banca dati interna di oltre 340 entità DXCC. Propone automaticamente Country, Continente e prefisso DXCC, permettendo all’operatore di validare o correggere i record prima della memorizzazione definitiva.
- Filtro anti-duplicati: individua e segnala preventivamente collegamenti identici (nominativo, banda, modo e orario sovrapponibile) già presenti nel database.
06. La griglia dei QSO e gestione record
La griglia centrale fornisce il controllo operativo completo dei collegamenti registrati:
- Colonne informative: Data/Ora UTC, Nominativo (Callsign), Banda, Frequenza precisa (letta da CAT), Modo (SSB, CW, FT8, ecc.), Rapporto inviato/ricevuto (RST), Locatore, DXCC e stato di conferma QSL (LoTW, eQSL, Carta).
- Ordinamento istantaneo: basta cliccare su una qualsiasi colonna per riordinare l’intero log in ordine crescente o decrescente.
- Menu contestuale da tasto destro (Context Menu):
- Lookup online: apertura immediata della scheda corrispondente su QRZ.com o HamQTH.
- QSY rapido: sintonizza istantaneamente la frequenza e il modo della radio sul QSO selezionato.
- QSO precedenti (Worked Before): elenco istantaneo di tutti i collegamenti storici effettuati con il corrispondente su altre bande o modi.
- Modifica ed Eliminazione sicura: accesso all’editor di dettaglio con richiesta di conferma anti-cancellazione involontaria.
- Barra Radio & Orologio UTC: intestazione superiore con lettura real-time della sintonia del ricetrasmettitore e doppio orologio digitale UTC/Locale.
07. Modalità di Logging avanzate Nuovo
La finestra di inserimento rapido supporta 3 profili operativi:
- Live Mode: ideale durante l’attività in tempo reale; orologio UTC sincronizzato al secondo, frequenza e modo compilati automaticamente via CAT.
- Manuale Mode: studiato per informatizzare vecchi quaderni cartacei o registri di attivazioni passate, con calendario a tendina e selezione oraria libera.
- Contest Mode: gestione snella dello scambio di rapporto (RST + progressivo seriale inviato e ricevuto), verifica moltiplicatori e salvataggio a tasto singolo (invio immediato).
08. Aggiungere e modificare QSO
L’inserimento manuale dispone di funzioni predittive intelligenti:
- Riconoscimento prefisso: digitando le prime lettere del nominativo, il programma mostra la bandiera, il Paese DXCC, la zona CQ, la zona ITU e l’azimut di puntamento antenna con la relativa distanza in chilometri.
- Compilazione automatica nome e QTH: grazie alla cache locale e all’integrazione con QRZ/HamQTH, i dati anagrafici del corrispondente vengono precompilati.
- Note e campi ausiliari: supporto per operatore ospite, potenza IOTA, referenze SOTA/POTA e commenti personali di contatto.
09. Filtri avanzati e ricerca record
Il motore di ricerca permette di isolare qualsiasi record in archivi di centinaia di migliaia di contatti:
- Ricerca a testo libero: filtro rapido per nominativo, locatore o commento direttamente dalla barra della griglia.
- Pannello filtri multicriterio: combinazione logica per intervallo di date, intervallo di frequenze, modo operativo singolo o raggruppato (Phone, CW, Digital) e stato di conferma (es. tutti i QSO non confermati su LoTW).
- Calcolo statistiche sui filtrati: riassunto in tempo reale del numero di QSO, entità distinte e continenti compresi nella selezione attiva.
10. Dupe Check e fusione archivi
Mantiene l’integrità del log evitando registrazioni multiple dello stesso QSO:
- Rilevamento duplicati in tempo reale: avviso visivo immediato durante la digitazione se il corrispondente è già stato collegato nella stessa banda e modo all’interno della finestra temporale configurata.
- Strumento Unisci File ADIF: fonde più registri esterni scartando le righe identiche e salvaguardando i campi più aggiornati (es. conferme LoTW o locatori più precisi).
11. Esportazione registri PDF ad alta resa
Modulo professionale per la trasformazione del log digitale in registri ufficiali:
- Layout conformi: impaginazione elegante in formato A4 orizzontale o verticale conforme agli standard ministeriali per quaderni di stazione.
- Personalizzazione testata: inserimento del proprio nominativo, logo ARI o personale, dati di stazione e numerazione automatica delle pagine.
- Filtro di esportazione: genera il PDF solo per un dato anno solare, attivazione specifica o contest.
12. Etichette e cartoline QSL
Stampa diretta per la gestione del traffico di cartoline cartacee:
- Formati standard: compatibile con fogli di etichette adesive commerciali (formati 24 o 16 etichette per foglio A4, es. Avery).
- Contenuto etichetta: nominativo del destinatario, dicitura Confirming QSO with, data/ora UTC, banda, modo, RST, indicazione PSE QSL / TNX QSL e manager se presente.
- Stampa selettiva: genera etichette esclusivamente per i record marcati con QSL Send = Requested / Queued.
13. Servizi Online (LoTW, eQSL, QRZ, ClubLog)
Integrazione bidirezionale con i principali repository mondiali:
- ARRL Logbook of The World (LoTW): esportazione protetta e firma digitale con TQSL con caricamento automatico e sincronizzazione delle conferme ricevute.
- eQSL.cc: upload automatico dei collegamenti in formato eQSL e scaricamento dell’accredito delle cartoline elettroniche.
- QRZ.com & ClubLog: sincronizzazione online dei log tramite API o upload ADIF diretto con aggiornamento dello stato di conferma.
14. DX Cluster & Bandmap integrata
Monitoraggio delle aperture propagative e stazioni rare:
- Connessione Telnet DX Cluster: collegamento ai server mondiali con riconnessione automatica e filtri personalizzabili (spot solo HF, VHF, stazioni europee o specifici modi).
- Bandmap grafica interattiva: visualizzazione degli spot sulla frequenza con codice colore (rosso: nuovo DXCC assoluto; arancione: nuovo slot banda/modo; grigio: già collegato).
- Doppio clic per QSY: sintonizza immediatamente il ricetrasmettitore sulla frequenza dello spot cluster.
- Dove si apre: menu Radio & Digitali → DX Cluster, pulsante 📡 DX Cluster nella barra (riattivabile da Impostazioni → Personalizza toolbar se nascosto) e voce nella colonna di sinistra. Può restare aperto insieme al cruscotto satelliti.
15. Controllo Radio CAT (OmniRig / Hamlib)
Gestione universale della radio con supporto bidirezionale:
- Doppio motore: supporto allo standard OmniRig (Rig 1 e Rig 2) e al versatile server di rete Hamlib rigctld.
- Lettura automatica continua: frequenza VFO, modo di emissione (LSB, USB, CW, DATA, FM, AM) e stato PTT.
- Inseguimento split: gestione facilitata delle operazioni split per DX expedition con controllo continuo del sub-ricevitore.
- Radio spenta senza rallentamenti Nuovo: se
rigctldè avviato ma la radio è spenta o il cavo è staccato, ADIF FZR sospende le letture invece di aspettare a ogni comando. Le pause crescono a ogni tentativo fallito (5, 10, 20, poi 30 secondi al massimo), così il programma resta reattivo. Quando riaccendi la radio la lettura riprende da sola entro la pausa in corso; con Connetti nelle impostazioni radio riprende subito. - S-meter a cubettini Nuovo: quando la radio Hamlib fornisce il livello di segnale, la barra radio mostra un misuratore segmentato da
S0aS9+60. I segmenti verdi indicano la scala S normale, quelli rossi il superamento oltre S9 (+dB), per una lettura immediata dell’intensità del corrispondente.
16. Integrazione WSJT-X e UDP
Comunicazione in rete locale con il software digitale di K1JT:
- Ricezione messaggi UDP: ascolto sulla porta predefinita
2237(o personalizzabile) per catturare decodifiche, stato QSO e salvataggio automatico. - Logging immediato: al momento della conferma QSO in WSJT-X, il contatto viene aggiunto all’istante nella griglia di ADIF FZR e nel database SQLite.
16b. Suite CW: Keyer e Decoder Nuovo
ADIF FZR 2.6 integra due strumenti dedicati alla telegrafia, accessibili dal menu Radio & Digitali: un keyer per trasmettere in CW attraverso la radio e un decoder per leggere il segnale ricevuto direttamente a video.
🔑 Keyer CW (trasmissione)
Il keyer invia il testo digitato come telegrafia reale sfruttando il comando \send_morse di Hamlib: richiede quindi una radio collegata via CAT (rigctld attivo) che supporti il keying da CAT (es. Icom IC-7300, IC-7100, IC-9700).
- Invio testo: scrivi il messaggio e premi Invia; il testo viene trasmesso parola per parola, così l’invio può essere interrotto immediatamente.
- Pulsante STOP: abortisce all’istante la trasmissione in corso (comando
\stop_morse), senza dover attendere la fine della stringa. - Regolazione velocità (WPM): imposta le parole al minuto; il valore viene applicato alla radio tramite il livello
KEYSPD. - Macro pronte: comodo per CQ, rapporti e sequenze ripetitive durante i contest o le attivazioni.
\send_morse, usa un’interfaccia keyer esterna.
📖 Decoder CW (ricezione)
Il decoder ascolta l’audio proveniente dalla radio (scheda audio del PC) e converte il segnale telegrafico in testo leggibile in tempo reale, con strumenti visivi per la sintonia fine.
- Analizzatore di spettro: mostra le righe di segnale nella banda audio, per individuare a colpo d’occhio la nota CW da decodificare.
- Mini-waterfall: cascata temporale che rende immediata la sintonia sul tono corretto anche in presenza di più segnali vicini.
- Aggancio picco automatico: attivando il flag Auto, il decoder si sintonizza da solo sul picco più forte nella banda utile (250–1150 Hz), evitando ronzii di rete (50/60 Hz).
- Decodifica adattiva: il motore si adatta alla velocità dell’operatore (testato da ~12 a 30 WPM) grazie a soglia adattiva, isteresi e temporizzazione dinamica del punto.
127.0.0.1:7300.
16c. Banner Propagazione Nuovo
Nella barra di stato è presente un banner che riepiloga in tempo reale le condizioni di propagazione ionosferica, aggiornato automaticamente dai dati solari di HamQSL (N0NBH).
- Indici solari: Solar Flux Index (SFI), indice A e indice K, con codice colore che passa dal verde al rosso al peggiorare delle condizioni.
- Condizioni per banda: stato di apertura HF (buono / discreto / scarso) suddiviso per gruppi di bande, giorno e notte.
- Dettaglio a richiesta: cliccando sul banner si apre una finestra con il quadro completo dei parametri solari e geomagnetici.
16d. Integrazione WSJT-X con rigctld (profilo dedicato) Nuovo
ADIF FZR può condividere la stessa radio con WSJT-X senza litigare per la porta COM. L’idea: ADIF FZR tiene la radio ed espone rigctld (Hamlib, TCP 127.0.0.1:4532); WSJT-X non apre la COM, ma si collega allo stesso rigctld come radio di tipo Hamlib NET rigctl, con PTT via CAT.
--rig-name=ADIFFZR e crea il file WSJT-X - ADIFFZR.ini clonando la tua WSJT-X.ini e cambiando solo le voci CAT/UDP. La tua config resta intatta.
Si gestisce tutto dal menu Radio & Digitali, con due voci:
- 📡 WSJT-X (profilo ADIF FZR): apre la finestra di configurazione. Nel riquadro Rilevamento un menu a tendina elenca tutte le installazioni WSJT-X presenti sul PC (standard, -improved, versioni diverse) con nome, versione e percorso: utile quando ne hai più d’una. Il pulsante 💾 Salva configurazione ricorda il percorso di
wsjtx.exe(in~/.adif_fzr_wsjtx.json) per l’avvio rapido; Crea / aggiorna profilo scrive il profilo dedicato. - ▶ Avvia WSJT-X + FZR ALERT: lancia in un colpo solo WSJT-X (profilo ADIF FZR) e la finestra FZR ALERT.
Valori impostati nel profilo (verificabili in WSJT-X → Impostazioni → Radio e Reporting):
| Dove | Voce | Valore |
|---|---|---|
| Radio | Rig | Hamlib NET rigctl |
| Radio | Network Server | 127.0.0.1:4532 |
| Radio | PTT Method | CAT |
| Reporting | UDP Server / Port | 127.0.0.1 / 2237 |
| Reporting | Accept UDP requests | attivo |
17. Modulo FZR ALERT in tempo reale Nuovo
Finestra HUD interattiva per l’attività FT8/FT4:
- Monitor decodifiche con flags: mostra i messaggi CQ in arrivo associando la bandiera della nazione del chiamante.
- Classificazione colorata istantanea:
- ● NEW: Entità DXCC mai collegata prima su alcuna banda o modo.
- ● NEW SLOT: Entità già lavorata, ma nuova per la banda o modo attivo.
- ● DUPE: Contatto già completato e registrato in archivio.
- Doppio clic per chiamata: cliccando sulla riga decodificata nel monitor, la chiamata del corrispondente viene inoltrata a WSJT-X per iniziare la trasmissione.
18. Satelliti, Doppia Frequenza & QO-100
Modulo dedicato all’operatività via ripetitori spaziali e satellite geostazionario QO-100:
- Doppia frequenza RX / TX: memorizzazione e registrazione distinta della frequenza di trasmissione uplink (es. 2.4 GHz per QO-100) e downlink (es. 10 GHz), con associazione corretta dei campi ADIF
FREQ_RXeBAND_RX. - Associazione nome satellite e modo di propagazione: catalogazione per transponder (
PROP_MODE: SAT) e selezione rapida del satellite (es.SAT_NAME: QO-100, RS-44, IO-117). - Replay passaggio con footprint Nuovo: per i satelliti LEO (es. RS-44) è possibile riprodurre in animazione il passaggio con l’impronta (footprint) che si sposta sulla mappa, per individuare le finestre di apertura comune verso una regione target (es. Nord America) e pianificare i collegamenti. Richiede il modulo Skyfield per il calcolo orbitale.
🛰️ Cruscotto satelliti Nuovo
Si apre da Award & Mappe → Passaggi satelliti. A sinistra la mappa del mondo, a destra lo sky plot, sotto i dati live e la tabella dei passaggi.
- Mappa NASA: lo sfondo è la foto della Terra NASA Blue Marble. Con la casella Mappa NASA si torna alla mappa con le sole coste. Se il file
world_map.jpgmanca, la casella è disattivata e si usano le coste. - Cielo dal tuo QTH (sky plot): grafico polare con azimut ed elevazione visti dal tuo locatore. Fuori dai passaggi mostra la curva tratteggiata del prossimo passaggio con ora ed elevazione massima; durante un passaggio mostra il satellite in tempo reale; nel replay il punto segue lo slider. Il pallino verde è l’AOS, il quadrato grigio il LOS.
- Traccia orbita: in modalità live disegna circa un’orbita in avanti (tratteggiata) e il breve tratto già percorso. Si attiva e disattiva con la casella Traccia orbita; nel replay si vede solo la traccia del passaggio scelto.
- Stazione DX: scrivi il locatore del corrispondente (es.
FN20) nel campo Stazione DX. Compare un marker sulla mappa, il riquadro live mostra azimut ed elevazione del satellite visti da lui e l’indicazione MUTUO ORA ✓ quando lo vedete entrambi. Nel replay il suo locatore entra nell’analisi della finestra mutua insieme alle regioni fisse. - Finestra non bloccante: il cruscotto resta sopra il logbook ma non blocca il resto del programma: DX Cluster, menu e pulsanti restano utilizzabili con il cruscotto aperto. Se è già aperto, scegliere di nuovo Passaggi satelliti lo porta in primo piano invece di aprirne un secondo.
19. Statistiche, Grafici e Monitoraggio Diplomi Ripristinato
Centro di controllo completo per visualizzare lo stato di avanzamento delle proprie attività radioamatoriali:
- Riepilogo DXCC: tabella dettagliata con conteggio delle entità collegate (Worked) e confermate (Confirmed) suddivise per ogni singola banda (da 160m ai 23cm) e modo operativo (SSB, CW, Digitale).
- Monitor Diplomi Ufficiali:
- WAS (Worked All States): tracciamento dei 50 stati americani con mappa interattiva e monitor speciale per l’award WAS250 (America 250th).
- WAZ (Worked All Zones): matrice di avanzamento delle 40 zone CQ.
- CQ Marathon: filtro progressivo annuale con conteggio separato di entità e zone valide per l’anno in corso.
- Grafici di attività: istogrammi temporali del numero di QSO per mese/anno e grafici a torta sulla percentuale di utilizzo di bande e modi.
20. Backup, Ripristino e Manutenzione Database Ripristinato
Funzionalità essenziali per prevenire la perdita di dati e preservare le massime prestazioni del sistema:
- Pianificazione Backup: configurazione del numero di copie di sicurezza da mantenere (rotazione giornaliera, settimanale o ad ogni chiusura del software).
- Integrazione Cloud Storage: salvataggio automatico delle copie di archivio all’interno di cartelle sincronizzate con Google Drive, Dropbox, OneDrive o un NAS locale di rete.
- Ripristino con 1 Clic: procedura guidata per recuperare un backup storico o ripristinare il database su un computer differente in caso di sostituzione dell’hardware.
- Manutenzione e Compattazione SQLite (VACUUM): strumento di deframmentazione interna che riduce la dimensione del file di database, riorganizza gli indici e velocizza le ricerche nei log più pesanti.
- Aggiornamento entità DXCC (cty.dat): download con un clic dell’ultimo file di prefissi Country aggiornato da Country-Files.com per mantenere sempre accurata la deduzione geografica.
20b. Registrazione software, Donatori e Aggiornamenti Nuovo
Dal menu ? (Aiuto) sono disponibili la registrazione del software e il controllo aggiornamenti.
🎗️ Registrazione e perk donatori
ADIF FZR è gratuito e pienamente funzionante senza registrazione. Chi sostiene il progetto con una donazione riceve una chiave di licenza personale legata al proprio nominativo.
- Come registrarsi: apri ? → Registrazione software, inserisci il tuo nominativo e la chiave ricevuta; l’app mostrerà Registered to <CALL>. All’avvio successivo compare un banner di benvenuto con il tuo nominativo.
- Chiavi non falsificabili: la verifica usa una firma crittografica Ed25519 ed è totalmente offline (nessun dato inviato in rete).
- Perk per i donatori: funzioni extra riservate a chi sostiene il progetto, tra cui l’esportazione/registro PDF avanzato e il registratore audio dei QSO.
- Richiesta chiave: la chiave si richiede tramite l’apposito modulo sul sito iw1fzr.it (indicando Email o telefono per la risposta).
🔄 Controllo aggiornamenti
- Verifica versione: da ? → Controlla aggiornamenti l’app confronta la versione installata con quella pubblicata online e segnala se è disponibile una release più recente, con il link al download.
21. Scorciatoie da tastiera e Quick Keys
Tasti di scelta rapida per la massima efficienza in stazione:
| Combinazione Tasti | Azione / Funzione |
|---|---|
F1 | Apre la documentazione e guida rapida in linea |
Ctrl + N | Apre la finestra di inserimento rapido nuovo QSO |
Ctrl + F | Attiva la casella di ricerca immediata nella griglia |
Ctrl + S | Forza il salvataggio manuale e il backup su file ADIF |
F2 | Salva il QSO corrente nella maschera di logging |
Esc | Annulla l’operazione corrente o chiude la finestra di dialogo |
Ctrl + L | Esegue il Lookup del nominativo corrente su QRZ.com |
Ctrl + Q | Invia la frequenza del QSO selezionato alla radio (QSY rapido) |
Complete Feature Index (Chapters 01 to 21)
- 01. Introduction: fast, lightweight ADIF standard logging suite.
- 02. Version 2.6 Features: FZR ALERT module, triple logging mode, SQLite backup, cloud integration.
- 03. Setup & Profiles: multi-operator, multi-station configurations and dark interface.
- 04. Log Management: opening, saving, and selective ADIF exports.
- 05. Log Import: universal importer with smart DXCC auto-deduction.
- 06. QSO Grid: sortable columns, context menu, worked-before view, quick QSY.
- 07. Logging Modes: Live, Manual (with calendar), and Contest exchanges.
- 08. QSO Details: real-time beam heading, distance, and country detection.
- 09. Advanced Filtering: multi-criteria search and filtered statistics.
- 10. Duplicate Checks: real-time dupe detection and log file merge tool.
- 11. PDF Export: print-ready station logs in high-resolution A4 format.
- 12. QSL Labels: label sheet printing with custom QSO confirmation tags.
- 13. Online Services: LoTW, eQSL, QRZ.com, and ClubLog synchronization.
- 14. DX Cluster: Telnet integration with color-coded bandmap.
- 15. Rig Control: dual CAT engine supporting OmniRig and Hamlib rigctld.
- 16. WSJT-X Link: real-time UDP packet processing on port 2237.
- 16d. WSJT-X CAT integration: shared rig via rigctld, dedicated profile (JTAlert config untouched), multi-install picker, one-click launch with FZR ALERT.
- 17. FZR ALERT: decoded FT8/FT4 monitoring with flags and status indicators.
- 18. Satellites & Split: dual frequency support for QO-100 and LEO satellites; satellite dashboard with NASA map, sky plot from your QTH, orbit track and DX station mutual-window check.
- 19. Awards & Statistics: DXCC band/mode matrix, WAS250, WAZ, and CQ Marathon tracking.
- 20. Maintenance & Backup: scheduled backups, cloud folders, and SQLite optimization (VACUUM).
- 21. Keyboard Shortcuts: quick keys for high-speed logging and rig control.
全21章の構成概要
- 01. 概要: ADIF標準形式に完全準拠した高速ログブック。
- 02. Ver 2.6 新機能: FZR ALERT、自動SQLiteクラウド保存、Hamlib対応。
- 03. 初期設定とプロファイル: 複数コールサイン、移動運用の個別管理。
- 04. ログの保存と書き出し: ADIF出力、自動増分バックアップ。
- 05. 他ロガーからの移行: DXCC自動判定ウィンドウ付きインポート。
- 06. QSOグリッド: 並べ替え、右クリック検索、無線機周波数連動。
- 07. ロギングモード: Live、Manual(日付指定)、コンテストモード。
- 08. 交信入力詳細: 相手局のビーム方位・距離・国旗自動表示。
- 09. 検索とフィルタ: 複数条件による絞り込みと集計表示。
- 10. 重複交信チェック: リアルタイムDupe警告とログ結合。
- 11. PDF出力: 業務日誌形式の高品位PDF生成。
- 12. QSL印刷: 市販宛名ラベルシートへの一括印字。
- 13. オンライン連携: LoTW、eQSL、QRZ.com、ClubLog自動更新。
- 14. DXクラスター: Telnet接続とバンドマップ色分け表示。
- 15. CAT無線機制御: OmniRigおよびHamlib rigctld対応。
- 16. WSJT-X連携: UDP(ポート2237)によるリアルタイム自動記録。
- 16d. WSJT-X CAT連携: rigctld経由で無線機を共有、専用プロファイル(JTAlert設定はそのまま)、複数インストールの自動選択、FZR ALERTとワンクリック起動。
- 17. FZR ALERT: デコード信号の未交信・新バンド判定と国旗表示。
- 18. 衛星運用・QO-100: アップリンク/ダウンリンク周波数の二重記録。NASA地図、自局からのスカイプロット、軌道トラック、DX局との相互可視判定を備えた衛星ダッシュボード。
- 19. アワードと統計: DXCC、WAS250、WAZ、CQ Marathon進捗管理。
- 20. データベース保守: 自動バックアップ、クラウド同期、SQLite最適化。
- 21. ショートカットキー: 高速運用のためのキーボード操作一覧。
📻 Guida CAT con Hamlib (Multi-Radio & Icom IC-7100)
Hamlib permette il radiocomando CAT su Windows, Linux e macOS senza dover dipendere esclusivamente da OmniRig. Il collegamento si basa sul demone server TCP rigctld.
rigctld (127.0.0.1:4532) può essere condiviso con WSJT-X, senza conflitti sulla porta COM. Vedi il capitolo 16d. Integrazione WSJT-X con rigctld (profilo dedicato).
4532), consentendo anche la condivisione della radio su rete locale.
1. Installazione di Hamlib
- Windows: Scarica l’archivio ZIP ufficiale
hamlib-w64-...zip, estrailo in una cartella permanente (es.C:\Hamlib). Il file primario necessario èC:\Hamlib\bin\rigctld.exe. - macOS: Installazione rapida da terminale tramite Homebrew:
brew install hamlib
- Linux (Debian / Ubuntu / Raspberry Pi OS):
sudo apt update && sudo apt install libhamlib-utils
2. Tabella Codici Modello Radio (Hamlib Model ID)
Hamlib riconosce ciascun apparato tramite un identificativo numerico univoco (consultabile per esteso con il comando rigctl --list):
| Marca e Modello Apparato | ID Hamlib | Baud Rate Tipico | Note Operative |
|---|---|---|---|
| Icom IC-7100 | 3070 |
19200 | Utilizzare la porta USB Virtuale CAT (porta Standard) |
| Icom IC-7300 | 3073 |
19200 / 115200 | Verificare l’indirizzo CI-V (default 94h) |
| Icom IC-9700 | 3081 |
19200 / 115200 | Supporto Dual Watch & Satellite |
| Yaesu FT-991 / 991A | 1035 |
38400 | Silicon Labs Dual CP210x (porta Enhanced) |
| Kenwood TS-590S | 2031 |
115200 | Driver Virtual COM Kenwood USB |
| Kenwood TS-590SG | 2037 |
115200 | Driver Virtual COM Kenwood USB |
| Elecraft K3 / K3S | 2029 / 2043 |
38400 | Comandi CAT testo compatibili Kenwood |
rigctl --list per l’elenco completo di tutti gli apparati supportati.
3. Configurazione all’interno di ADIF FZR
- Apri il menu Impostazioni → Controllo radio (CAT).
- Seleziona il backend Hamlib.
- Imposta l’host su
127.0.0.1e la porta di rete su4532. - Spunta la casella “Avvia rigctld automaticamente”.
- Inserisci il percorso del file eseguibile (es.
C:\Hamlib\bin\rigctld.exe). - Inserisci il Modello (es.
3070per IC-7100), la Porta Seriale (es.COM5su Windows o/dev/ttyUSB0su Linux/Mac) e il corretto Baud Rate. - Fai clic su Salva e Connetti. La frequenza e il modo correnti appariranno subito nella barra in alto.
▶ Opzione alternativa: Avvio manuale di rigctld da riga di comando
Se preferisci avviare il demone prima di ADIF FZR, apri il Prompt dei Comandi / Terminale e lancia:
rigctld -m 3070 -r COM5 -s 19200 -t 4532
Parametri utilizzati: -m codice radio, -r porta seriale, -s velocità baud, -t porta TCP locale.
🍏 Guida all’installazione su macOS
Istruzioni per configurare ADIF FZR su sistemi Apple macOS (processori Intel e Apple Silicon M1/M2/M3).
Essendo un pacchetto distribuito direttamente per la comunità radioamatoriale senza notarizzazione a pagamento Apple, al primo avvio macOS bloccherà l’apertura con un avviso di sicurezza.
Procedura di primo sblocco:
- Scarica l’applicazione e trascinala nella cartella Applicazioni.
- Non fare doppio clic direttamente: fai clic con il tasto destro (o Control + Clic) sull’icona di ADIF FZR e scegli Apri dal menu a discesa.
- Nella finestra di dialogo che compare, premi il pulsante Apri per confermare l’autorizzazione permanente.
- Se l’avviso persiste, apri Impostazioni di Sistema → Privacy e Sicurezza, scorri verso il basso e premi “Apri comunque” in corrispondenza del blocco segnalato.
Individuazione porte USB su macOS:
Su Mac le radio collegate via USB compaiono sotto forma di dispositivi virtuali Unix. Per scoprire il nome assegnato alla porta della tua radio, apri il Terminale e scrivi:
ls /dev/cu.*
Utilizza in ADIF FZR la porta identificata, solitamente denominata tipo /dev/cu.SLAB_USBtoUART o /dev/cu.usbserial-XXXX.
🔌 Guida a com0com (Porte Virtuali per Windows)
Il driver virtuale com0com consente di creare coppie di porte seriali virtuali incrociate (null-modem). È indispensabile per condividere una singola porta radio tra più programmi software contemporaneamente (ad esempio sincronizzare ADIF FZR, WSJT-X e un programma di log esterno).
Passaggi per la configurazione:
- Scarica e installa la versione con driver firmati di Null-modem emulator (com0com).
- Apri lo strumento di amministrazione Setup Command Prompt o l’interfaccia grafica di configurazione com0com.
- Crea una nuova coppia virtuale (ad esempio CNCA0 associata a CNCB0).
- Rinomina le due estremità in porte compatibili con i programmi radio, ad esempio:
- Estremità A:
COM10 - Estremità B:
COM11
- Estremità A:
- Spunta le opzioni “enable buffer overrun” se richiesto dal software di routing.
- Fai clic su Apply. Da questo momento, qualsiasi informazione CAT trasmessa sulla porta
COM10sarà istantaneamente ricevuta sulla portaCOM11.
❓ Risoluzione Problemi & FAQ
🔴 La radio non risponde ai comandi CAT o la frequenza rimane a zero
- Verifica in Gestione Dispositivi (Windows) o
ls /dev/cu.*(Mac) che la porta seriale non sia occupata da un altro software già aperto (es. WSJT-X o un altro logbook). Una porta COM fisica può essere aperta da un solo programma alla volta (usa Hamlib rigctld o com0com per condividerla). - Verifica che il Baud Rate impostato nel menu del ricetrasmettitore corrisponda esattamente a quello configurato in ADIF FZR.
- Per gli apparati Icom, controlla che l’Indirizzo CI-V sia impostato sul valore standard o che la funzione CI-V Transceive sia abilitata.
🔴 FZR ALERT non visualizza i pacchetti decodificati da WSJT-X
- In WSJT-X, vai su File → Settings → Reporting.
- Verifica che la casella Enable logged contact ADIF broadcast e la casella di broadcast UDP siano attive.
- Accertati che l’indirizzo sia impostato su
127.0.0.1e la porta UDP su2237. - Verifica che il Firewall di Windows non stia bloccando le connessioni locali in ingresso per ADIF FZR.
🔴 Errore durante l’importazione di file ADIF molto grandi
ADIF FZR 2.6 gestisce senza problemi archivi oltre 100.000 QSO grazie al motore SQLite. Durante l’importazione iniziale di archivi voluminosi attendi che la barra di caricamento completi l’indicizzazione dei duplicati senza chiudere la finestra.
🔴 Come trasferire o ripristinare il log su un secondo computer?
È sufficiente copiare la cartella di backup SQLite generata dal programma (o puntare la cartella di backup su un servizio cloud come Dropbox / OneDrive). Sul nuovo PC apri la funzione Strumenti → Ripristina Database e seleziona l’ultimo file .db salvato.
IW1FZR · Logbook Manager
ADIF FZR
Gestione completa del logbook radioamatoriale: importazione ed esportazione ADIF, registri PDF, QSL, upload verso i principali servizi online, DX Cluster, controllo radio via OmniRig e ricezione WSJT-X in tempo reale.
Comprehensive amateur radio logbook management: ADIF import/export, PDF logs, QSLs, uploads to major online services, DX Cluster, rig control via OmniRig, and real-time WSJT-X reception.
アマチュア無線ログブックの包括的な管理:ADIFのインポート/エクスポート、PDFログ、QSLカード、主要オンラインサービスへのアップロード、DXクラスター、OmniRigによる無線機制御、およびリアルタイムのWSJT-X受信機能。
Indice
Table of Contents
目次
- Introduzione Introduction はじめに
- Primo avvio e profili First Run & Profiles 初回起動とプロファイル
- Aprire e salvare log Opening & Saving Logs ログを開く・保存
- Importare da altri logger Importing from Other Loggers 他のロガーからのインポート
- La griglia dei QSO The QSO Grid QSOグリッド
- Aggiungere e modificare QSO Adding & Editing QSOs QSOの追加と編集
- Filtri e ricerca Filters & Search フィルターと検索
- Dupe Check e unione Dupe Check & Merging 重複チェックと結合
- Registri PDF PDF Logbooks PDFログ出力
- Etichette e cartoline QSL QSL Labels & Cards QSLラベルとカード
- Upload e download QSL QSL Upload & Download QSLのアップロードとダウンロード
- DX Cluster DX Cluster DXクラスター
- Controllo radio / OmniRig Rig Control / OmniRig 無線機制御 / OmniRig
- WSJT-X Live WSJT-X Live WSJT-X ライブ連携
- Strumenti e calcoli Tools & Calculations ツールと計算
- Personalizzazione Customization カスタマイズ
- Scorciatoie da tastiera Keyboard Shortcuts キーボードショートカット
01 Introduzione Introduction はじめに
ADIF FZR è un gestore di logbook per radioamatori. Lavora con file in formato ADIF (lo standard per lo scambio di log tra programmi) e permette di organizzare, filtrare, stampare e sincronizzare i tuoi QSO con i servizi di conferma più diffusi.
L’interfaccia è disponibile in italiano e inglese e supporta temi chiaro e scuro. Tutte le impostazioni sono legate a un profilo operatore, così puoi gestire più nominativi o più stazioni sullo stesso computer.
ADIF FZR is a logbook manager for radio amateurs. It works with ADIF format files (the standard for exchanging logs between programs) and allows you to organize, filter, print, and synchronize your QSOs with the most popular confirmation services.
The interface is available in Italian and English and supports light and dark themes. All settings are linked to an operator profile, allowing you to manage multiple callsigns or stations on the same computer.
ADIF FZRは、アマチュア無線家向けのログブック管理ソフトウェアです。プログラム間でログを交換するための標準規格であるADIF形式のファイルを処理し、QSOの整理、フィルタリング、印刷、および主要なオンラインアワードサービスとの同期を可能にします。
インターフェースはイタリア語と英語に対応しており、ライトテーマとダークテーマをサポートしています。すべての設定はオペレータープロファイルに紐付けられているため、1台のPCで複数のコールサインや運用場所を簡単に管理できます。
02 Primo avvio e profili First Run & Profiles 初回起動とプロファイル
Al primo avvio una procedura guidata ti chiede di creare il tuo primo profilo operatore: nominativo, locatore, nome e i dati che verranno usati come stazione trasmittente nei log e nelle QSL.
Gestione profili
Puoi creare più profili, impostarne uno come predefinito e passare dall’uno all’altro. Ogni profilo memorizza lingua, tema, colori PDF, disposizione della toolbar, server DX Cluster personalizzati, impostazioni radio OmniRig e l’ultimo log aperto.
Upon first launch, a setup wizard will guide you to create your first operator profile: callsign, locator, name, and the data that will be used as the transmitting station in logs and QSL cards.
Profile Management
You can create multiple profiles, set one as default, and switch between them. Each profile stores language, theme, PDF colors, toolbar layout, custom DX Cluster servers, OmniRig rig settings, and the last opened log file.
初回起動時にウィザードが表示され、最初のオペレータープロファイル(コールサイン、グリッドロケーター、氏名、およびログやQSLカードで送信局として使用されるデータ)を作成します。
プロファイル管理
複数のプロファイルを作成して、どれかひとつをデフォルトに設定し、必要に応じて切り替えることができます。各プロファイルには、言語、テーマ、PDFカラー、ツールバーの配置、カスタムDXクラスターサーバー、OmniRig無線機設定、および最後に開いたログファイルの設定が個別に保存されます。
03 Aprire e salvare log Opening & Saving Logs ログを開く・保存
Apre un file .adi o .adif. Il programma riconosce le varianti prodotte dai diversi logger e normalizza automaticamente date, orari, bande e frequenze.
Salva il log corrente. È l’operazione da fare dopo ogni importazione per rendere permanenti le modifiche.
Elenco degli ultimi file aperti per riaprirli rapidamente. Se l’ultimo log era su un supporto rimovibile non più presente, il programma parte comunque e lo segnala nella barra di stato.
Opens a .adi or .adif file. The software automatically recognizes variations produced by different loggers and normalizes dates, times, bands, and frequencies.
Saves the current logbook. This operation should be performed after every import to make changes permanent.
A list of recently opened files for quick access. If the last used log was on a removable drive that is no longer connected, the program will still start and alert you in the status bar.
.adi または .adif ファイルを開きます。当プログラムは、他の様々なロガーが出力したADIFのバリエーションを自動的に認識し、日付、時刻、バンド、周波数を標準形式に正規化します。
現在のログブックを保存します。インポート作業の後は、変更を確定させるために必ずこの保存操作を行ってください。
素早く再アクセスできるよう、最近開いたファイルのリストを表示します。最後に使用したログファイルが取り外された外付けドライブなどにある場合でも、プログラムは正常に起動し、ステータスバーで警告を表示します。
04 Importare da altri logger Importing from Other Loggers 他のロガーからのインポート
Oltre all’apertura di file ADIF standard, ADIF FZR importa direttamente dai database di alcuni logger molto diffusi, senza doverli esportare prima.
Importa ADIF intelligente Nuovo 2.4
Prima di importare, mostra un’anteprima del file: numero di QSO, periodo coperto, stazioni uniche, bande e modi presenti, percentuale con locatore, conferme LoTW e il programma di origine. Puoi scegliere se aggiungere al log corrente o sostituirlo, e attivare il salto dei duplicati (stesso nominativo, banda e modo entro due minuti). Funziona con qualsiasi logger che esporta ADIF: MSHV, N3FJP, DXKeeper, Logger32, WSJT-X, QRZ, LoTW.
Importa da Ham Radio Deluxe Nuovo 2.4
Legge direttamente il database di HRD (file .hrdsql) in sola lettura. Trova automaticamente la tabella dei contatti e mappa i campi HRD sui campi ADIF standard.
Importa da Log4OM Nuovo 2.4
Legge il database SQLite di Log4OM (file .sqlite). Riconosce i nomi dei campi propri di Log4OM e ricava data e ora dal campo unico qsodate, inclusi i dati per i collegamenti via satellite.
Importa Cabrillo
Importa i log dei contest in formato Cabrillo (.cbr, .log).
In addition to standard ADIF files, ADIF FZR can import data directly from the native databases of several popular logger applications, eliminating the need for prior manual export.
Smart ADIF Import New 2.4
Shows a comprehensive preview before importing: total QSOs, date range, unique callsigns, detected bands and modes, locator grid coverage percentage, LoTW confirmations, and the source software. You can choose to append to or replace the current logbook, and toggle automatic dupe skipping (same callsign, band, and mode within 2 minutes). Works with MSHV, N3FJP, DXKeeper, Logger32, WSJT-X, QRZ, LoTW, etc.
Import from Ham Radio Deluxe New 2.4
Reads the HRD database file (.hrdsql) directly in read-only mode. It automatically locates the contact table and maps specific HRD fields to standard ADIF fields.
Import from Log4OM New 2.4
Reads the native SQLite database used by Log4OM (.sqlite file). It parses Log4OM-specific field names and extracts date and time from the unified qsodate field, including satellite operations data.
Import Cabrillo
Imports contest logs formatted in the Cabrillo standard (.cbr, .log).
標準のADIFファイルを開くだけでなく、ADIF FZRはいくつかの非常に普及しているロガーのデータベースから直接データをインポートすることができ、事前にADIF出力する手間が省けます。
スマートADIFインポート 新規 2.4
インポートする前に、QSO数、運用期間、ユニーク局数、バンドとモードの構成、グリッドロケーターの網羅率、LoTWの確認状況、および元プログラム名などのプレビューを表示します。現在のログに追加するか上書きするかを選択でき、重複スキップ(2分以内の同一コールサイン、バンド、モード)を有効にできます。MSHV, N3FJP, DXKeeper, Logger32, WSJT-X, QRZ, LoTWなどのあらゆるADIF形式に対応します。
Ham Radio Deluxe からインポート 新規 2.4
HRDのデータベースファイル(.hrdsql)を読み取り専用で直接解析します。通信履歴テーブルを自動的に見つけ出し、HRD特有のフィールドを標準のADIFフィールドにマッピングします。
Log4OM からインポート 新規 2.4
Log4OMが使用するSQLiteデータベース(.sqlite ファイル)を読み込みます。Log4OM固有のフィールド名を認識し、統合された qsodate フィールドから正確な日時を抽出します。サテライト運用のデータも完全にサポートしています。
Cabrillo インポート
Cabrillo規格(.cbr、.log)で構築されたコンテストログをインポートします。
05 La griglia dei QSO The QSO Grid QSOグリッド
Il cuore del programma è la tabella centrale che elenca tutti i QSO del log. Ogni riga è un collegamento, con colonne per data, ora UTC, nominativo, nome operatore, banda, modo, rapporti, locatore, stato delle conferme e altro.
Personalizza colonne Nuovo 2.4
Scegli quali colonne mostrare e in quale ordine, con le frecce su/giù. La disposizione viene salvata nel profilo. La colonna del numero progressivo resta sempre visibile.
The core of the application is the central main table listing all QSOs in the active logbook. Each row represents a single contact, with columns dedicated to date, UTC time, callsign, name, band, mode, signal reports, grid locator, confirmation status, and more.
Customize Columns New 2.4
Choose which columns to display and adjust their order using the up/down controls. The column layout is saved securely within the active profile. The sequence index number column always remains fixed on the left.
プログラムの中核となるのは、ログ内のすべてのQSOを表示する中央のメインテーブルです。各行が1つの交信を表し、日付、UTC時刻、コールサイン、オペレーター名、バンド、モード、レポート、グリッドロケーター、QSL確認状況などの列が含まれます。
列のカスタマイズ 新規 2.4
上下の矢印ボタンを使って、表示する列とその並び順を自由に選択できます。この配置はプロファイルに保存されます。通し番号(インデックス)の列は常に左端に固定されます。
06 Aggiungere e modificare QSO Adding & Editing QSOs QSOの追加と編集
Apre la finestra di inserimento con orologio UTC in tempo reale, rapporti predefiniti per modo, e riconoscimento automatico della banda dalla frequenza. Per i collegamenti via satellite normalizza il nome del satellite.
Lettura dalla radio Nuovo 2.4
Se hai OmniRig configurato, il pulsante 📻 Leggi frequenza/modo dalla radio compila automaticamente frequenza, banda e modo leggendoli dal ricetrasmettitore. Vedi la sezione Controllo radio / OmniRig.
Modifica e cancellazione
Doppio clic su una riga per modificarla. Puoi selezionare più righe insieme ed eliminarle. Ogni eliminazione può essere annullata con Ctrl+Z (la cronologia tiene fino a dieci operazioni).
Opens the manual entry window featuring a real-time UTC clock, mode-specific default signal reports, and automated frequency-to-band calculation. For satellite contacts, it normalizes the satellite name automatically.
Read from Radio New 2.4
If OmniRig is configured, the 📻 Read frequency/mode from radio button automatically fills frequency, band, and mode by reading them from the transceiver. See the Rig Control / OmniRig section.
Editing & Deleting
Double-click any row to open the edit dialog. Multi-row selection is fully supported for bulk deletions. Any accidental deletion can be immediately rolled back using Ctrl+Z (undo history remembers up to 10 sequential actions).
リアルタイムのUTC時計、モード別のデフォルトレポート、および入力された周波数からバンドを自動判別する機能を備えた入力ウィンドウを開きます。サテライト交信の場合は、衛星名を自動的に標準化します。
無線機から読み取り 新規 2.4
OmniRigを設定している場合、📻 無線機から周波数/モードを読み取り ボタンで、トランシーバーから周波数、バンド、モードを自動的に読み込んで入力できます。「無線機制御 / OmniRig」セクションを参照してください。
編集と削除
行をダブルクリックすると交信データを編集できます。また、複数の行を同時に選択してまとめて削除することも可能です。誤って削除した場合は、Ctrl+Z ですぐに元に戻すことができます(最大10件の操作履歴を保持)。
07 Filtri e ricerca Filters & Search フィルターと検索
Barra di ricerca
Cerca in tempo reale su tutti i campi mentre digiti: nominativo, locatore, nome, commento e altro.
Filtri della barra laterale
Sotto il profilo operatore trovi filtri sempre a portata di mano: intervallo di date (con calendario), nominativo, banda, modo e satellite. Le opzioni di banda, modo e satellite si popolano automaticamente dai QSO presenti nel log. Un indicatore mostra quanti QSO sono visibili sul totale.
Search Bar
Performs instant, real-time filtering across all relevant fields as you type: callsign, locator grid, name, comments, etc.
Sidebar Filters
Positioned conveniently beneath the active profile module, the sidebar grants rapid access to key parameters: date ranges (via popup calendars), specific callsigns, bands, operational modes, and satellites. Dynamic filter choices adapt based strictly on data found in the current logbook. A status counter shows visible vs. total QSOs.
検索バー
入力と同時に、コールサイン、グリッドロケーター、氏名、コメントなど、すべてのフィールドにわたってリアルタイムで瞬時に検索を行います。
サイドバーのフィルター
アクティブなプロファイル表示の下部には、常時アクセス可能な詳細フィルター(カレンダー付き日付範囲、コールサイン、バンド、モード、衛星)が配置されています。バンド、モード、衛星の選択肢は、ログ内に存在するデータから自動的に構築されます。インジケーターには、全交信数のうち現在何件が絞り込まれて表示されているかが示されます。
08 Dupe Check e unione Dupe Check & Merging 重複チェックと結合
Dupe Check
Individua i QSO duplicati raggruppandoli per nominativo, banda e modo, con una tolleranza in minuti configurabile per l’orario (così collegamenti quasi simultanei vengono riconosciuti come lo stesso QSO). Puoi selezionare quali eliminare, usare il pulsante che seleziona tutti tranne il primo di ogni gruppo, e annullare l’eliminazione.
Unisci log
Combina più file ADIF in un unico log, con rimozione dei duplicati entro una tolleranza di tempo che puoi impostare.
Dupe Check
Identifies duplicate QSOs by clustering matching entries based on callsign, band, and mode, utilizing a configurable time window tolerance (so near-simultaneous entries are safely caught as duplicates). You can select individual records to purge, use a smart button to select all copies except the initial original record, and safely undo changes.
Merge Logs
Combines multiple external ADIF files into the currently opened logbook, complete with automated duplicate filtering using your designated time tolerance parameters.
重複チェック (Dupe Check)
コールサイン、バンド、モードに基づいて重複しているQSOをグループ化し抽出します。時間の許容誤差(分単位)を設定できるため、ほぼ同時に記録された同じ交信も確実に見つけ出せます。個別に選択して削除することも、「各グループの最初のデータ以外をすべて選択」する機能を使って一括処理することも可能です。処理の取り消しもサポートしています。
ログの結合
複数のADIFファイルを1つのログブックに統合します。設定された時間の許容範囲に基づいて重複データをクレンジングしながら結合処理を行います。
09 Registri PDF PDF Logbooks PDFログ出力
ADIF FZR genera registri di stazione in PDF pronti per la stampa, con copertina grafica, intestazioni e numerazione delle pagine.
Copertina grafica Aggiornata 2.4
La prima pagina presenta un mappamondo stilizzato in stile radar/HUD: anelli graduati, mirino, globo con reticolo geografico, stazioni DX con onde radio e archi di collegamento. Il colore segue quello primario impostato nei colori PDF.
Colori e formato
Personalizza colori, formato pagina (A4/Letter) e quali colonne includere nel registro, scegliendole in fase di generazione.
ADIF FZR exports high-quality, print-ready PDF station logbooks, including formal covers, detailed page headers, and automated sequential page numbering.
Graphic Cover Sheet Updated 2.4
The cover page displays a stylized world map rendered in a sharp radar/HUD aesthetic: calibrated ranges, crosshairs, a global geographic grid, and radio wave propagation paths to distant DX locations. The color scheme automatically mirrors the primary accent color assigned in your PDF layout configurations.
Colors & Layout
Fully customize text and table accents, choose physical dimensions (A4 or US Letter), and dynamically pick which database columns will appear in the output document during compilation.
ADIF FZRは、グラフィカルな表紙、詳細なヘッダー、および自動ページ番号付きの印刷可能な局用PDFログブックを生成します。
グラフィカルな表紙 更新 2.4
最初のページには、レーダー/HUDスタイルのスタイリッシュな世界地図が表示されます。同心円の目盛、照準線、地理的グリッド付きの地球儀、電波の伝搬を示す波形と接続アークが描かれます。配色は、PDF設定で指定したプライマリカラーに自動的に連動します。
カラーと書式
テーマカラーや用紙サイズ(A4/レターサイズ)の変更、および出力時にログブックに含める列の選択を細かく指定できます。
10 Etichette e cartoline QSL QSL Labels & Cards QSLラベルとカード
QSL Manager
Prepara le etichette QSL per le stazioni da confermare, con formati predefiniti e personalizzati (dimensioni e disposizione per foglio A4 o Letter). Gestisce la coda delle QSL da inviare.
QSL Designer
Progetta il layout della cartolina QSL.
QSL Manager
Prepares QSL label sheets for pending physical confirmations, utilizing widespread presets or customizable dimensions optimized for standard A4 and US Letter grid arrays. Effectively manages the internal outbound QSL printing queue.
QSL Designer
Design and customize the visual layout and print template of your physical QSL cards.
QSLマネージャー
未発行の交信向けにQSL用宛名・データラベルを準備します。定型サイズおよびカスタムサイズ(A4またはレターサイズ紙の面付けレイアウト)に対応し、送信待ちQSLキューを効率的に管理できます。
QSLデザイナー
QSLカードのデザインや印刷レイアウトを設定します。
11 Upload e download QSL QSL Upload & Download QSLのアップロードとダウンロード
ADIF FZR sincronizza le conferme con i principali servizi online.
| Servizio | Operazione |
|---|---|
| LoTW (Logbook of The World) | Upload e download conferme |
| eQSL | Upload e download conferme |
| Cloudlog | Upload QSO |
| Club Log | Upload QSO |
| QO-100 / dati satellite | Upload dedicato |
ADIF FZR synchronizes confirmations seamlessly with major online ham radio logging services.
| Service | Supported Operations |
|---|---|
| LoTW (Logbook of The World) | Upload QSOs and download incoming confirmations |
| eQSL | Upload QSOs and download incoming confirmations |
| Cloudlog | Direct real-time QSO uploading |
| Club Log | Direct logbook uploading |
| QO-100 / Satellite data | Dedicated orbital satellite upload interface |
ADIF FZRは、主要なオンラインアワードおよびログサービスとの交信データの同期を強力にサポートします。
| サービス | 対応している操作 |
|---|---|
| LoTW (Logbook of The World) | QSOデータのアップロードおよび確認データのダウンロード |
| eQSL | QSOデータのアップロードおよび確認データのダウンロード |
| Cloudlog | 交信データの直接アップロード |
| Club Log | ログブックのアップロード |
| QO-100 / サテライトデータ | 衛星通信データ専用のアップロード機能 |
12 DX Cluster DX Cluster DXクラスター
Finestra di collegamento a un DX Cluster via telnet, con le spot in tempo reale.
Server
Un elenco ampio di nodi noti e attivi (italiani, europei, nord-americani e asiatici). Puoi aggiungere i tuoi server personalizzati con il pulsante + Server: nome, host e porta vengono salvati nel profilo. Il login usa automaticamente il nominativo del profilo attivo.
Auto-riconnessione Nuovo 2.4
Se la connessione cade (rete instabile, timeout del nodo), l’app riprova automaticamente con attesa progressiva (5s, 10s, 20s, poi 30s). La barra di stato mostra il conto alla rovescia e il numero del tentativo. Se sei tu a disconnetterti manualmente, la riconnessione non parte. Attivabile/disattivabile dalle Opzioni.
Notifiche DXCC nuovo Nuovo 2.4
Quando arriva la spot di un possibile DXCC non ancora nel tuo log, ricevi un avviso sonoro e un popup in basso a destra con nominativo, banda, modo e frequenza. Ogni entità viene notificata una volta per banda. Suono e popup sono attivabili separatamente dalle Opzioni.
Le spot
Ogni spot mostra UTC, nominativo DX, frequenza, banda (colorata), modo, spotter e commento. La lista tiene fino a 500 righe.
Filtri
- Banda — mostra solo le bande selezionate (la scelta viene salvata nel profilo)
- Modo — filtra per modo operativo
- Callsign / prefisso — con caratteri jolly. Esempi:
IK1*(tutti gli IK1),CU,CO,CM(Cuba), un nominativo esatto, o un prefisso comeIper l’Italia - Evidenzia DXCC nuovi — segnala le entità non ancora presenti nel log
Inviare uno spot
Segnala una stazione al cluster indicando nominativo, frequenza e commento. Se hai una spot selezionata, i campi si precompilano. Lo spot viene attribuito automaticamente al nominativo con cui sei collegato (il profilo attivo).
Dallo spot al log e alla radio
Doppio clic (o clic destro) su una spot precompila la finestra Aggiungi QSO con nominativo, frequenza, banda e modo. Con il clic destro puoi anche scegliere 📻 QSY radio su questa spot per portare il ricetrasmettitore sulla frequenza (vedi sezione Controllo radio / OmniRig). Se apri più spot di seguito, la finestra Aggiungi QSO si aggiorna invece di aprirsene una nuova ogni volta.
Opens a live connection pane to DX Cluster nodes via Telnet protocol, displaying incoming spots in real time.
Servers
Includes a large built-in index of active Italian, European, North American, and Asian cluster nodes. You can save customized server entries instantly using the + Server key: description, host URL, and telnet port are cached in your profile. Login strings automatically use the callsign of the active profile.
Auto-Reconnect New 2.4
If the connection drops (unstable network, node timeout), the app automatically retries with progressive back-off (5s, 10s, 20s, then 30s). The status bar shows the countdown and attempt number. If you disconnect manually, reconnection does not start. Toggle it in the Options dialog.
New DXCC Notifications New 2.4
When a spot arrives for a possible DXCC not yet in your log, you get an audible alert and a popup in the bottom-right corner with callsign, band, mode, and frequency. Each entity is notified once per band. Sound and popup are toggled independently in the Options.
Incoming Spots
Each individual spot entry presents UTC time, DX callsign, exact frequency, color-coded band markers, mode, reporting spotter, and appended comments. The list holds up to 500 records concurrently.
Filters
- Band — Limits the output feed strictly to checked frequencies (the choice is saved in the profile).
- Mode — Selects specific modulation modes.
- Callsign / Prefix — Supports basic wildcards. Examples:
IK1*(all IK1 stations),CU,CO,CM(Cuba area), exact full callsigns, or country prefixes likeIfor Italy. - Highlight New DXCC — Visually calls out entities that have not yet been worked or confirmed in the active logbook.
Sending a Spot
Announces an active station to the connected cluster network by submitting callsign, frequency, and comment details. Highlighting an active spot automatically populates the form fields. The spot submission is signed with the user callsign attached to the active session.
From Spot to Logbook and Radio
Double-clicking (or right-clicking) an incoming spot fills the Add QSO window with callsign, frequency, band, and mode pre-loaded. Via right-click you can also choose 📻 QSY radio to this spot to tune the transceiver to the frequency (see the Rig Control / OmniRig section). If you open several spots in a row, the Add QSO window updates instead of opening a new one each time.
Telnet接続を介してDXクラスターノードに接続し、受信したスポット情報をリアルタイムでウィンドウに一覧表示します。
サーバー
国内外(イタリア、ヨーロッパ、北米、アジア)の主要なアクティブノードの豊富なリストが内蔵されています。+ サーバー ボタンを使用して、カスタムサーバー(名前、ホスト名、ポート番号)をプロファイルに追加保存できます。ログイン時には、現在アクティブなプロファイルのコールサインが自動送信されます。
自動再接続 新規 2.4
接続が切断された場合(ネットワークの不安定、ノードのタイムアウトなど)、アプリは段階的な待機時間(5秒、10秒、20秒、その後30秒)で自動的に再接続を試みます。ステータスバーにはカウントダウンと試行回数が表示されます。手動で切断した場合は再接続は開始されません。オプションで有効/無効を切り替えられます。
新規DXCC通知 新規 2.4
まだログにない可能性のあるDXCCのスポットが届くと、音による通知と、コールサイン、バンド、モード、周波数を示すポップアップが右下に表示されます。各エンティティはバンドごとに一度だけ通知されます。音とポップアップはオプションで個別に切り替えられます。
スポット情報
各スポットには、UTC時刻、DX局のコールサイン、周波数、カラー表示のバンド、モード、スポットした局(スポッター)、およびコメントが表示されます。リストには最大500行の情報が保持されます。
フィルター設定
- バンド — 選択されたバンドのスポットのみを表示します(選択内容はプロファイルに保存されます)。
- モード — 特定の運用モードで絞り込みます。
- コールサイン / プリフィックス — ワイルドカード検索に対応。例:
IK1*(すべてのIK1局)、CU,CO,CM(キューバ)、正確なコールサイン、またはイタリアを示すIなどのプリフィックス。 - 未交信DXCCのハイライト — 現在のログ内でまだ交信または確認されていない珍しいエンティティを視覚的に強調表示します。
スポットの送信
コールサイン、周波数、コメントを入力して、接続中のクラスターネットワークに現在の運用情報をアナウンスします。リスト上のスポットを選択した状態だと内容が自動入力されます。スポットは自動的にログイン中のコールサインで署名されます。
スポットからログ・無線機への連携
受信したスポットをダブルクリック(または右クリック)すると、「QSOを追加」ウィンドウにコールサイン、周波数、バンド、モードが自動入力されます。右クリックからは 📻 このスポットの周波数へQSY を選んで、トランシーバーをその周波数に合わせることもできます(「無線機制御 / OmniRig」セクション参照)。複数のスポットを連続して開くと、毎回新しいウィンドウが開くのではなく、既存の「QSOを追加」ウィンドウが更新されます。
13 Controllo radio / OmniRig Rig Control / OmniRig 無線機制御 / OmniRig
ADIF FZR può controllare il ricetrasmettitore tramite OmniRig, il diffuso componente di controllo radio per Windows (di Alex VE3NEA). Il controllo è bidirezionale: dall’app alla radio (QSY) e dalla radio all’app (lettura frequenza/modo). Funziona con quasi tutte le radio moderne: Icom, Yaesu, Kenwood, Elecraft.
Impostazioni radio Nuovo 2.4
Finestra dedicata dove puoi:
- Avvio automatico — decidi se lanciare OmniRig all’apertura dell’app, così è già pronto per il QSY
- Percorso di OmniRig.exe — con pulsante Sfoglia. Se lo lasci vuoto, l’app lo cerca da sola nei percorsi noti
- Cartella Rigs — la cartella dei file di definizione radio (
.ini), anch’essa con Sfoglia - 🔍 Verifica — testa i percorsi e mostra cosa trova (exe, radio, modi)
- ▶ Avvia OmniRig ora — lo lancia subito per provare
I percorsi tipici su Windows sono C:\Program Files (x86)\Afreet\OmniRig\OmniRig.exe e …\Afreet\OmniRig\Rigs. Le impostazioni si salvano nel profilo.
QSY dalla spot alla radio
Nel DX Cluster, clic destro su una spot → 📻 QSY radio su questa spot: la radio si porta sulla frequenza (e sul modo) della spot. Nelle Opzioni del cluster puoi anche attivare QSY radio anche al doppio click, così il doppio clic apre Aggiungi QSO e sposta la radio insieme.
Lettura dalla radio
Nella finestra Aggiungi QSO, il pulsante 📻 Leggi frequenza/modo dalla radio compila frequenza, banda e modo leggendoli dal ricetrasmettitore in tempo reale.
Band plan IARU R1
Quando fai QSY, il modo può essere dedotto dalla frequenza secondo il band plan IARU Region 1: sotto 10 MHz LSB, sopra USB, con i segmenti CW, digitali (FT8) e SSB al posto giusto. Così anche gli spot che non indicano il modo mandano la radio sul modo corretto. Attivabile dalle Opzioni del cluster (ha priorità sul modo dello spot).
Modi digitali
Un’opzione dedicata permette di scegliere se i modi digitali (FT8, FT4, PSK) impostano USB-D (USB data, il modo giusto per FT8) oppure RTTY. RTTY resta sempre RTTY.
Display radio in tempo reale Nuovo 2.4
Nella barra laterale, sotto il profilo operatore, un display sempre visibile mostra la frequenza letta dalla radio in tempo reale (aggiornata ogni secondo), con modo e banda. Un pallino verde indica che la lettura è attiva. Un clic sulla frequenza apre Aggiungi QSO già compilato.
Il display gestisce entrambi i VFO. Il VFO-A (ricezione) è mostrato in grande; il VFO-B è sempre visibile sotto: grigio spento quando la radio è in simplex, acceso in rosa con l’etichetta TX quando lo split è attivo. Un badge arancione SPLIT compare quando lo split è in funzione.
Controllo VFO e split Nuovo 2.4
Sotto il display, due pulsanti comandano la radio:
- ⇄ A/B — scambia VFO-A e VFO-B (swap). Sulle radio che espongono il comando (es. IC-9700) è immediato.
- SPLIT — attiva/disattiva lo split. Il pulsante diventa arancione quando lo split è attivo, riflettendo lo stato reale della radio.
ADIF FZR can control your transceiver through OmniRig, the popular Windows rig-control component (by Alex VE3NEA). Control is bidirectional: from app to radio (QSY) and from radio to app (read frequency/mode). It works with virtually all modern radios: Icom, Yaesu, Kenwood, Elecraft.
Radio Settings New 2.4
A dedicated window where you can:
- Auto-start — choose whether to launch OmniRig when the app opens, so it’s ready for QSY
- Path to OmniRig.exe — with a Browse button. Leave it empty and the app searches known paths automatically
- Rigs folder — the folder of radio definition files (
.ini), also with Browse - 🔍 Test — checks the paths and shows what it finds (exe, radio, modes)
- ▶ Start OmniRig now — launches it immediately to try
Typical Windows paths are C:\Program Files (x86)\Afreet\OmniRig\OmniRig.exe and …\Afreet\OmniRig\Rigs. Settings are saved in the profile.
QSY from Spot to Radio
In the DX Cluster, right-click a spot → 📻 QSY radio to this spot: the radio tunes to the spot’s frequency (and mode). In the cluster Options you can also enable QSY radio on double-click too, so a double-click opens Add QSO and moves the radio together.
Read from Radio
In the Add QSO window, the 📻 Read frequency/mode from radio button fills frequency, band, and mode by reading them from the transceiver in real time.
IARU R1 Band Plan
When you QSY, the mode can be deduced from the frequency per the IARU Region 1 band plan: LSB below 10 MHz, USB above, with CW, digital (FT8), and SSB segments in the right place. This way even spots without a stated mode set the radio correctly. Enable it in the cluster Options (it takes priority over the spot’s mode).
Digital Modes
A dedicated option lets you choose whether digital modes (FT8, FT4, PSK) set USB-D (USB data, the correct mode for FT8) or RTTY. RTTY always stays RTTY.
Live Radio Display New 2.4
In the sidebar, below the operator profile, an always-visible display shows the frequency read from the radio in real time (updated every second), with mode and band. A green dot indicates the reading is active. Clicking the frequency opens Add QSO pre-filled.
The display handles both VFOs. VFO-A (receive) is shown large; VFO-B is always visible below: dimmed gray when the radio is in simplex, lit in pink with a TX label when split is active. An orange SPLIT badge appears when split is engaged.
VFO & Split Control New 2.4
Below the display, two buttons control the radio:
- ⇄ A/B — swaps VFO-A and VFO-B. Immediate on radios that expose the command (e.g. IC-9700).
- SPLIT — toggles split on/off. The button turns orange when split is active, reflecting the radio’s real state.
ADIF FZRは、Windows向けの普及した無線機制御コンポーネントであるOmniRig(Alex VE3NEA氏作)を通じてトランシーバーを制御できます。制御は双方向です:アプリから無線機へ(QSY)、および無線機からアプリへ(周波数/モードの読み取り)。Icom、Yaesu、Kenwood、Elecraftなど、ほぼすべての最新機種に対応します。
無線機設定 新規 2.4
専用ウィンドウで以下を設定できます:
- 自動起動 — アプリ起動時にOmniRigを起動するかどうかを選択(QSYの準備が整います)
- OmniRig.exe のパス — 参照ボタン付き。空欄の場合、アプリが既知のパスを自動検索します
- Rigs フォルダー — 無線機定義ファイル(
.ini)のフォルダー。同じく参照ボタン付き - 🔍 確認 — パスをテストし、検出内容(exe、無線機、モード)を表示します
- ▶ OmniRigを今すぐ起動 — すぐに起動して試せます
Windowsでの一般的なパスは C:\Program Files (x86)\Afreet\OmniRig\OmniRig.exe および …\Afreet\OmniRig\Rigs です。設定はプロファイルに保存されます。
スポットから無線機へのQSY
DXクラスターで、スポットを右クリック → 📻 このスポットの周波数へQSY:無線機がスポットの周波数(およびモード)に合わせられます。クラスターのオプションで ダブルクリックでもQSY を有効にすると、ダブルクリックで「QSOを追加」を開くと同時に無線機も移動します。
無線機からの読み取り
「QSOを追加」ウィンドウの 📻 無線機から周波数/モードを読み取り ボタンで、トランシーバーから周波数、バンド、モードをリアルタイムで読み込んで入力します。
IARU R1 バンドプラン
QSY時に、モードをIARU第1地域のバンドプランに従って周波数から判別できます:10MHz以下はLSB、以上はUSB、CW・デジタル(FT8)・SSBの各セグメントが適切に設定されます。これにより、モードが記載されていないスポットでも無線機を正しいモードに設定できます。クラスターのオプションで有効化できます(スポットのモードより優先されます)。
デジタルモード
専用オプションにより、デジタルモード(FT8、FT4、PSK)を USB-D(USBデータ、FT8に適したモード)に設定するか、RTTYに設定するかを選べます。RTTYは常にRTTYのままです。
リアルタイム無線機ディスプレイ 新規 2.4
サイドバーのオペレータープロファイルの下に、無線機から読み取った周波数をリアルタイム(1秒ごとに更新)で表示する常時表示ディスプレイがあります。モードとバンドも表示され、緑の点は読み取りが有効であることを示します。周波数をクリックすると、内容が入力された状態でQSOを追加が開きます。
ディスプレイは両方のVFOに対応しています。VFO-A(受信)は大きく表示され、VFO-Bは常にその下に表示されます:シンプレックス時は薄いグレー、スプリット有効時はTXラベル付きのピンク色で点灯します。スプリット動作中はオレンジのSPLITバッジが表示されます。
VFO・スプリット制御 新規 2.4
ディスプレイの下にある2つのボタンで無線機を制御します:
- ⇄ A/B — VFO-AとVFO-Bを入れ替えます。コマンドに対応した無線機(例:IC-9700)では即座に動作します。
- SPLIT — スプリットのオン/オフを切り替えます。スプリット有効時はボタンがオレンジ色になり、無線機の実際の状態を反映します。
14 WSJT-X Live WSJT-X Live WSJT-X ライブ連携
Riceve in tempo reale i QSO che logghi in WSJT-X, tramite il protocollo di rete UDP. La funzione è opzionale e si attiva manualmente: nulla parte da solo.
Configurazione base (solo WSJT-X)
Se usi solo WSJT-X, senza altri programmi in ascolto:
- In WSJT-X: Impostazioni → Reporting → UDP Server impostato su
127.0.0.1, porta2237(valori predefiniti) - In ADIF FZR apri WSJT-X Live, lascia il campo Indirizzo vuoto, verifica la porta e premi ▶ Avvia ascolto
Configurazione multicast (con HRD e JTAlert) Nuovo 2.4
La soluzione è il multicast: WSJT-X invia a un indirizzo speciale che tutti i programmi possono ascoltare insieme.
- In WSJT-X: Impostazioni → Reporting → UDP Server imposta l’indirizzo
239.255.0.0(indirizzo multicast) invece di127.0.0.1. Porta2237invariata. - In HRD e JTAlert, imposta lo stesso indirizzo multicast dove previsto (JTAlert di solito segue automaticamente WSJT-X).
- In ADIF FZR → WSJT-X Live, nel campo Indirizzo scrivi
239.255.0.0e premi ▶ Avvia ascolto. Lo stato mostrerà “● Multicast 239.255.0.0:2237”.
Così WSJT-X, HRD, JTAlert e ADIF FZR ricevono tutti insieme gli stessi dati, senza conflitti di porta.
239.255.0.0 = multicast, per convivere con HRD/JTAlert.Uso
Ogni QSO loggato in WSJT-X compare nella lista con data, UTC, nominativo, banda, modo, rapporti e locatore. Puoi aggiungerlo al log manualmente (selezione + pulsante) oppure attivare l’opzione Aggiungi al log automaticamente, che resta comunque una scelta tua.
Captures contacts in real time as you log them inside WSJT-X via the network UDP protocol. This feature is strictly optional and must be enabled manually by the operator.
Basic Setup (WSJT-X only)
If you use WSJT-X alone, with no other programs listening:
- In WSJT-X: Settings → Reporting → UDP Server set to
127.0.0.1, port2237(defaults) - In ADIF FZR open WSJT-X Live, leave the Address field empty, verify the port, and click ▶ Start Listening
Multicast Setup (with HRD and JTAlert) New 2.4
The solution is multicast: WSJT-X sends to a special address that all programs can listen to together.
- In WSJT-X: Settings → Reporting → UDP Server set the address to
239.255.0.0(a multicast address) instead of127.0.0.1. Keep port2237. - In HRD and JTAlert, set the same multicast address where applicable (JTAlert usually follows WSJT-X automatically).
- In ADIF FZR → WSJT-X Live, in the Address field enter
239.255.0.0and click ▶ Start Listening. The status will show “● Multicast 239.255.0.0:2237”.
This way WSJT-X, HRD, JTAlert, and ADIF FZR all receive the same data together, with no port conflicts.
239.255.0.0 = multicast, to coexist with HRD/JTAlert.Usage
Every newly logged digital QSO inside WSJT-X immediately populates the buffer list with date, UTC, callsign, band, mode, signal reports, and grid locator. You can append entries manually (select items and push add) or toggle the Auto-Add to Log option based on your preference.
ネットワークのUDPプロトコルを介して、WSJT-X内で交信を記録した瞬間にデータをリアルタイム受信します。この機能はオプショナルであり、手動で有効にする必要があります(自動で通信が開始されることはありません)。
基本設定(WSJT-X のみ)
他のプログラムを受信に使わず、WSJT-X 単独で使う場合:
- WSJT-X側:設定 → Reporting → UDP Server を
127.0.0.1、ポート2237(標準値)に設定します。 - ADIF FZR側:WSJT-X ライブ連携 を開き、アドレス欄を空欄のままにして、ポートを確認し ▶ 受信を開始 をクリックします。
マルチキャスト設定(HRD・JTAlert と併用) 新規 2.4
解決策はマルチキャストです: WSJT-Xが特別なアドレスに送信し、すべてのプログラムが同時に受信できるようにします。
- WSJT-X側:設定 → Reporting → UDP Server のアドレスを
127.0.0.1ではなく239.255.0.0(マルチキャストアドレス)に設定します。ポート2237はそのままです。 - HRDとJTAlertでも、該当する箇所に同じマルチキャストアドレスを設定します(JTAlertは通常、自動的にWSJT-Xに追従します)。
- ADIF FZR → WSJT-X ライブ連携 の アドレス 欄に
239.255.0.0と入力し、▶ 受信を開始 をクリックします。ステータスに「● Multicast 239.255.0.0:2237」と表示されます。
これにより、WSJT-X、HRD、JTAlert、ADIF FZRのすべてが、ポートの競合なく同じデータを一緒に受信できます。
239.255.0.0 = マルチキャスト、HRD/JTAlertとの併用向け。使い方
WSJT-Xでログが保存されるたびに、日付、UTC時刻、コールサイン、バンド、モード、レポート、およびグリッドロケーターが受信リストに表示されます。データを選択して手動でログに追加することも、好みに応じてログへ自動追加するオプションを有効にすることも可能です。
15 Strumenti e calcoli Tools & Calculations ツールと計算
Calcolatore distanza
Calcola distanza e azimut tra due locatori Maidenhead.
SAT Doctor
Verifica e corregge i dati dei QSO via satellite, con modifica diretta.
Grafici
Statistiche visive del log: QSO per banda, modo, andamento nel tempo.
Deduci country
Ricava automaticamente il paese DXCC dai nominativi tramite l’analisi del prefisso.
Distance Calculator
Computes physical distance and relative beam heading azimuth between any two Maidenhead grid locators.
SAT Doctor
Scans, validates, and batch-corrects specific satellite orbital data parameters within your logged records.
Charts & Statistics
Generates rich visual statistics of your station logbook: totals categorized by band, operational mode, and timeline activity maps.
Country Inference
Automatically derives the correct DXCC entity country from callsign inputs via detailed prefix structure tracking algorithms.
距離計算ツール
2つのマイデンヘッド・グリッドロケーター間の直線距離とアンテナの方向(方位角)を正確に計算します。
SAT ドクター
サテライト(衛星)交信のデータをスキャンして検証し、不整合があればウィンドウ上で直接一括修正します。
各種グラフ表示
ログの統計データを視覚化します。バンド別、モード別の交信比率や、長期的な運用の推移を確認できます。
カントリー自動判別
プリフィックス解析アルゴリズムを用いて、コールサインの文字列から正確なDXCCエンティティ(国や地域)を自動導出します。
16 Personalizzazione Customization カスタマイズ
Preferenze
Lingua, tema, colorazione delle righe, riapertura dell’ultimo log all’avvio e altre opzioni generali.
Toolbar personalizzabile
Scegli quali pulsanti mostrare nella barra strumenti e in quale ordine. La barra si adatta alla larghezza della finestra disponendosi su una o due righe.
Tema e lingua
Passa tra chiaro/scuro e italiano/inglese in qualsiasi momento.
Preferences
Manages primary language choice, visual themes, custom grid row highlighting, auto-reopening the last active logbook, and general behaviors.
Customizable Toolbar
Pick exactly which functional buttons appear in the top toolbar and define their sorting. The toolbar scales horizontally, shifting smoothly onto one or two rows depending on app window geometry.
Theme & Language Quick Toggle
Instantly alternate between light/dark themes and available system languages during runtime.
環境設定
使用言語、インターフェーステーマ、グリッド行の色分け表示、起動時に最後のログファイルを自動で開き直すかどうかの設定などを包括的に行えます。
ツールバーのカスタマイズ
ツールバーに表示する機能ボタンの種類と順番を個別に選択できます。ツールバーはアプリウィンドウの幅に合わせて可変し、自動的に1行または2行に最適配置されます。
テーマと言語の即時切り替え
プログラムの動作中であっても、いつでもライト/ダークテーマや表示言語を変更できます。
17 Scorciatoie da tastiera Keyboard Shortcuts キーボードショートカット
| Scorciatoia | Azione |
|---|---|
| Ctrl+O | Apri file ADIF |
| Ctrl+S | Salva ADIF |
| Ctrl+N | Aggiungi QSO |
| Ctrl+Z | Annulla ultima eliminazione |
| Alt+F4 | Esci |
| Shortcut | Action Description |
|---|---|
| Ctrl+O | Open external ADIF file |
| Ctrl+S | Save current ADIF logbook |
| Ctrl+N | Create new manual QSO record |
| Ctrl+Z | Undo last record deletion action |
| Alt+F4 | Exit application cleanly |
| ショートカット | 実行されるアクション |
|---|---|
| Ctrl+O | 外部のADIFファイルを開く |
| Ctrl+S | 現在のADIFログブックを保存する |
| Ctrl+N | 手動で新しいQSOレコードを追加する |
| Ctrl+Z | 直前に行ったレコード削除アクションを取り消す |
| Alt+F4 | アプリケーションを安全に終了する |
ADIF FZR 2.4 — Logbook Manager · IW1FZR
73 de IW1FZR